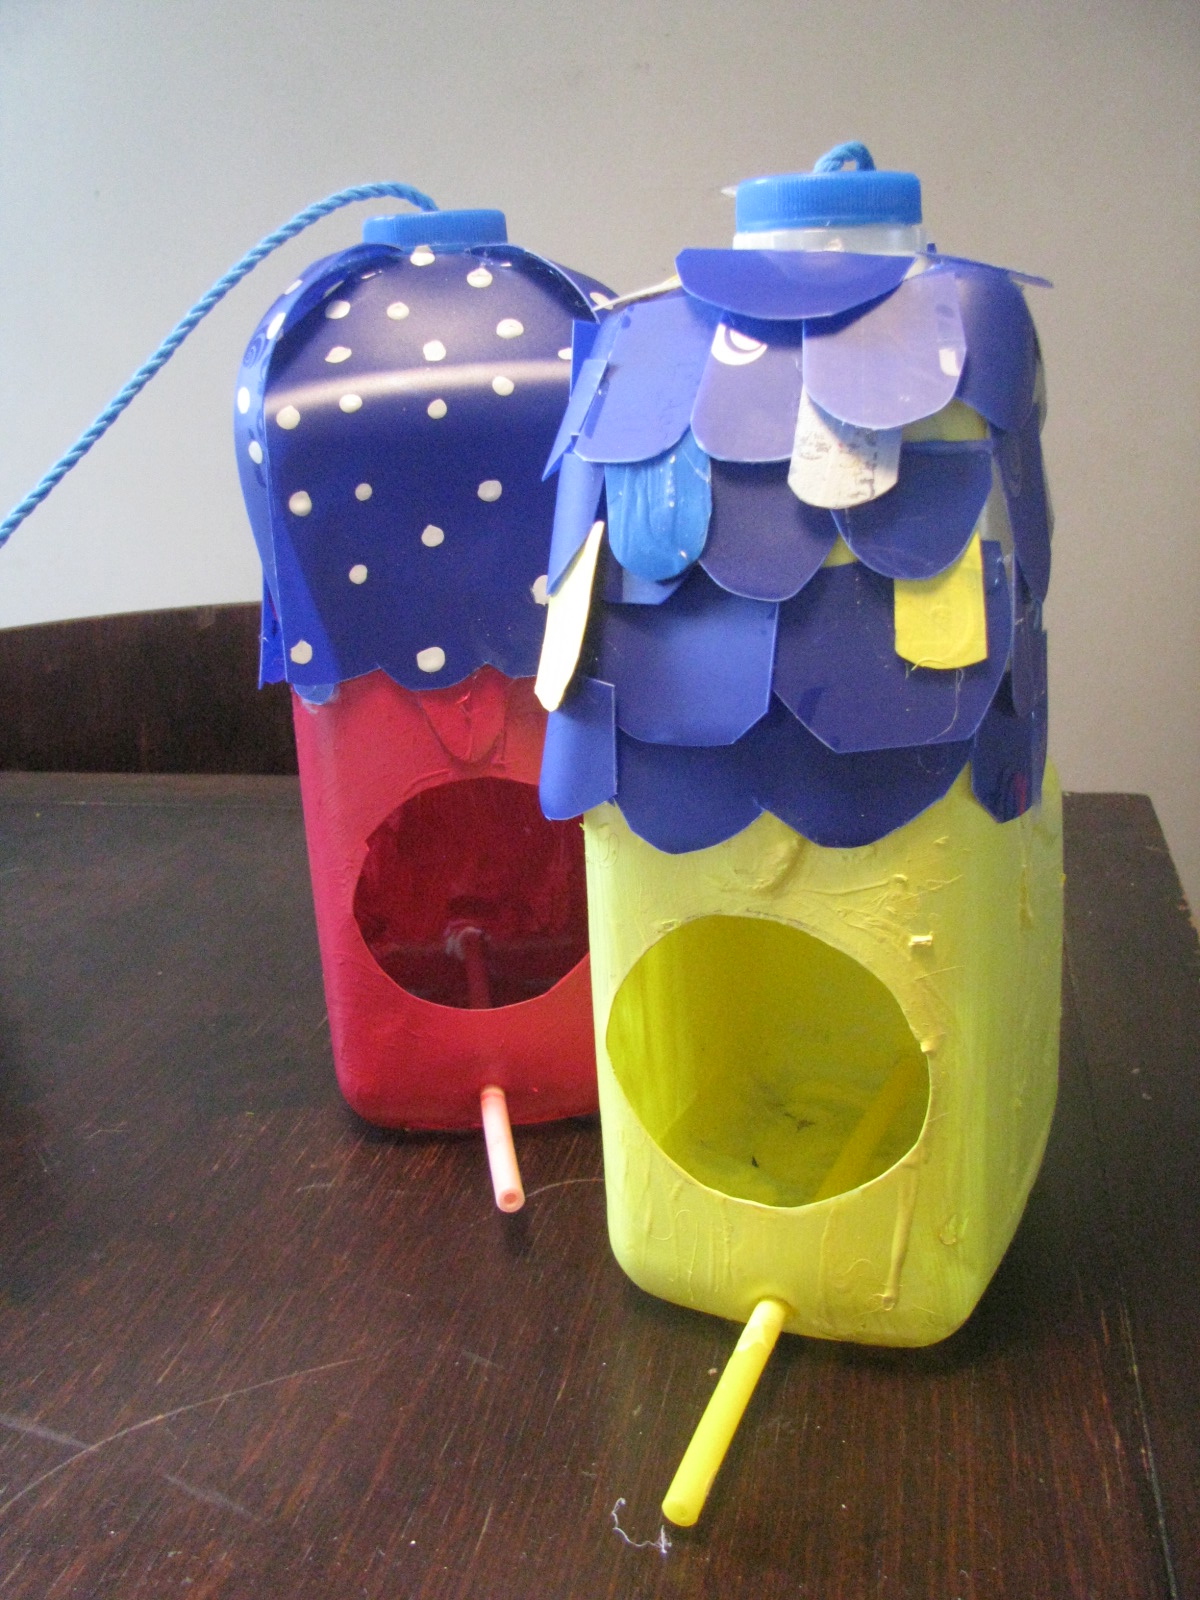
I found this very cute upcycling project here. You just use good, sharp scissors to cut a empty 1.5 l fizzy bottle to shape, paint the outside, let it dry and draw on features. This one is M's. I'm going to use the same idea to make T a bear one. I'll paint it brown and cut the ears as half circle shapes. You could do a monster, pigs, rabbit- any animal really.
whimsy
Showing posts with label upcycling. Show all posts
Friday, 17 July 2015
Friday, 21 February 2014
a duchess and a jewellery box
Recently, a friend restored a very special ( had it all my life) duchess for us, I love it.
She buys and restores all sorts of furniture and while I was there I spied this jewellery box. While I was gushing over it and wondering how I could persuade her to it sell it to me she told me I could have it! How lucky are we?
The music starts playing as you open a drawer and stops when you close it. So sweet.
It got gold handles and a two coats of the left over blue paint we used in our bathroom ( Resene half oriental bay) and I think it looks perfect.
Saturday, 26 October 2013
my new light shades
I was sitting on the loo at school a few weeks ago and I looked up. I know, a little too much information but I'm going somewhere with this! Anyway, I noticed that the girl's toilets at my school had very cool industrial type lightshades- and the boy's loo did too. Our school is being demolished this year to make way for a fancy new one in 2014. Well, after asking our Principal for them (and having him admit was one of the strangest requests he's had) I replaced the lightshades with plastic ones and bought these babies home.
I thought they were beige, turns out they were a lovely brushed silver covered in 20 years of dust. I love them : )
Joining in with Max, it's not op shopping but I'm showing off anyway!
Labels:
op shopping,
upcycling
Sunday, 22 September 2013
from cot to chalkboard
I'm very sentimental. I've been holding on to our cot for a long time. It has such lovely memories. It was given to me by a friend. It was white, wooden, smaller than the average cot so it was the perfect size for me to feel happy about them going into it after a bassinette.
I love the ages our kids are now but I do sometimes think back to the days when they would fall asleep in my arms, nap like in these pictures and were my wee babies...
It was out on our deck for a while, then it came inside as a day bed in T's room. I decided it was time to let it go so had the hubby dismantle it. We will be using the bar sides to make a clothes rack/ drier for in the laundry and I kept one end of it to make this:
I love the ages our kids are now but I do sometimes think back to the days when they would fall asleep in my arms, nap like in these pictures and were my wee babies...
It was out on our deck for a while, then it came inside as a day bed in T's room. I decided it was time to let it go so had the hubby dismantle it. We will be using the bar sides to make a clothes rack/ drier for in the laundry and I kept one end of it to make this:
It just rests up against the wall, I like how there's a place for the chalk to sit too. I'm not sure what I'll do with it when they're too old for chalkboards!
Labels:
upcycling
Sunday, 6 January 2013
chair rescue!
On New Years day we went for a walk on the beach. We were at the Rangitata huts. Every New Years night they light a gorgeous big bonfire at midnight. Below is the bonfire all ready to go AFTER I rescued 5 ( what I think are lovely) bentwood chairs. I'm going to do them up by giving them a sand and a rub with linseed oil. The previous owner of the chairs noticed that they had been removed and word got around about my 'pre-match' actions. Thankfully, she was pleased to hear that they were going to a good home and like most of the people there had a bit of a chuckle at my 'nuttiness'- but seriously- could you have watched them burn?
I plan to add padded seats too so I'll post pictures when they're done : )

Tuesday, 16 October 2012
milk bottle bird homes
I found this is the lastest Resene Habitat magazine. I'm quite partial to the odd paint test pot so knew we'd be able to rustle two of these up for our birdie friends ( especially with 35% off test pots until the end of October). Here's the link to full instructions resene one for the birds. We adapted ours a bit.
We went to Resene and I let the kid's choose a colour they liked. M chose a lovely dark pink called sensual red and T chose, no surprises here, a yellow called gorse.
I used an icecream container for M's roof as I burnt myself with the glue gun putting T's little roof tiles on and wasn't doing another one that way- ow!
I wonder if any birds will venture in?
Sunday, 22 July 2012
channelling macgyver
I have to confess that I had a teenage crush on the, much older than me at the time man named Mac Gyver. This post is dedicated to him - the man that could make anything out of anything!
As kids my brother and I liked swing ball. I wanted to see if the kids would like it too but didn't want to buy one only to find that they're not as keen as we were. I thought it would be pretty simple to make. It turns out it wasn't. The one in the photos is version 3 as my first two attempts kept ending up with the string wrapped around the pole, which I think is why the real swing ball sets have that spring shaped thing on the top. The old metal handle I found in the garage helped hold the string out and further away from the pole- which reduced the amount of times the string got wrapped around. I think my man MacGyver would be proud of me!
The pole for our fancy swing ball is an old broom handle. The base is an umbrella stand. The metal bit at the top is an old drawer handle (I think) and I just used a long self tapping screw to attach it to the top of the pole. I used plastic string as I thought it would be stronger, put a tennis ball inside one of T's odd socks (we have plenty of these) and tied it to the end of the string. I just guessed the length. M loved it and it didn't take her long to get the hang of it. T was more interested in his bike today but I'm sure he'll give it a go tomorrow.
I'm off to play that cool theme song again.
Subscribe to:
Posts (Atom)


+final+edit.jpg)