whimsy

whimsy

Friday, 30 November 2012

chocolate fudge

I altered a standard fudge recipe as I didn't have enough milk. I used sour cream instead and  it came out really well ( and yum) so I thought I'd share it:


Cook time:   30 minutes

Ingredients:
2 cups sugar
25g butter
1/4 cup milk
1/2 a container of sour cream
1 tablespoon cocoa
1/8 teaspoon vanilla essence


Directions:
1. Combine all the ingredients in a saucepan except vanilla essence.
2. Gently bring to a light boil and stir occasionally
3. After approx 20 minutes start testing the fudge by dropping a little into a glass of cold water. If it forms a soft ball then it is ready.
4. Remove from the heat, add vanilla and beat until thick. Pour into dish and leave to set. Cut once set with a knife heated under the hot tap.


Thursday, 29 November 2012

fabric advent calendar

It's my first attempt, it's far from straight, I was too lazy to iron it before the photos and it's not perfectly sewn but I made it with love. It's for my nephews and their baby brother or sister who arrives next year.

I've filled the first 2 days with lollipops and freddo frogs but will leave the job of filling the other pockets up to my brother and sister in law : ).

I had the red fabric in my stash, bought the green polka dot and Christmas ones from Spotlight and Lincraft. I used sticky back felt for the white dots and after cutting out the numbers in red felt I just glued them on. I hand stitched the top sides of each of the pockets to strengthen them. The little silver bells on 25 make a really nice 'Christmasy' sound.

I love fabric and I'm really looking forward to having the time to visit the new Make Cafe in Riccarton Road, it looks like they have a great play area- but I'm thinking some 'mum time' there is in my future:


Tuesday, 27 November 2012

reindeer food

I got this idea from a friend ( thanks Pam : ) ) who sent me this link: http://www.examiner.com/article/easy-magical-reindeer-food-recipe-and-poem-for-printable-tags

On her suggestion we also added some wild bird seed into our mix. The candy cane bags are from Spotlight.  I printed off the poem and glued them to the back of some of last years Christmas cards. Ribbon from my stash was used to tie the poems to the bags.

I plan to make up 17 of these to give to my students as Christmas gifts : )


Magic Reindeer Food Recipe Mix 1/2 cup of uncooked oats (not instant oatmeal), a generous amount of multi-colored glitter (or sugar cookie sprinkes) in a plastic sandwich bag. Tie with a ribbon and add a tag with the poem or verse below).
Print out the Christmas poem or short verse below and attach it to the bag. Sprinkle outside on Christmas Eve to start a magical evening with your children.

Reindeer Food Verse:
“On Christmas Eve, sprinkle this wonderful Reindeer Food on your lawn. The shiny glitter will sparkle in the moonlight and the smell of oats will guide Rudolph to your home.” (full poem below)

Magical Reindeer Food Poem
Inside this special package is a treat
but not for you!
It contains magical reindeer food
and here is what you do.
Sprinkle this magical reindeer food
carefully on the ground.
And tonight if you are lucky
Santa's reindeer will come around.
But here's a secret I have to tell,
one you must try to keep.
That Santa's reindeer only come
when you are fast asleep.
So quickly put your jammies on
and get a story read,
Then sprinkle this magic treat outside
and hurry off to bed!

Saturday, 24 November 2012

candles

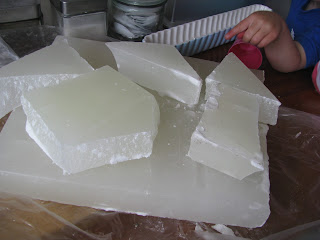
A few months ago when we were in Wellington my mum gave me a huge hunk of wax. I'm not sure where she got it but I threw it into my suitcase and it's been sitting here waiting to be used since. 

I love junk and op shops and went to a few yesterday ( and a neighbour's garage sale today) and got some glasses and odd china cups to make candles. I bought the wicks off trade me. It was easier than I'd thought it it would be. I melted the lumps of wax using an old pot in a double boiler set up. The melted wax poured easily and chop sticks came in handy to prop up the wicks so that they stayed in the middle. Some are for the table on Christmas Day and others we'll wrap up as gifts. 

Next time we might buy some dying chips and colour the wax- but I liked them white this time. The last picture is the candle I've kept for me, it was a birthday gift from a friend a few years ago and the saucer was broken in one of the EQs.


starting to set
double boiler


pretty!

Friday, 23 November 2012

stegasaurus socks

These are awesome so I made the boy some. In Winter I'll make him long ones.


T in the pairs I made him- they're not great shots but you get the idea- it was very hard to keep him still!


Wednesday, 21 November 2012

a fabric wrapped 5

I'd been looking for a 5 to go on M's wall at her party next month. I liked this one,

picture source: http://lowescreativeideas.com/idea-library/projects/Pom-Pom_Number.aspx

 but would have had to buy 2 boxes of coffee filters and some spray paint to make it.

Yarn wrapping, which I love, is really big on the internet lately...

Picture source: http://bkids.typepad.com/bookhoucraftprojects/2011/09/project-93-yarn-font.html

but I didn't have enough time ( or yarn/ wool) to do that so decided to wrap strips of fabric around a big piece of wire shaped like a 5.

I used pva glue to attach it and clothes pegs to hold it all together as it dried. I want it to sit quite flat on the wall so will have to think of a way to get it like that- it's a bit bent and 'sticky outy' at the moment.

We'll hang it above the party food table. M wanted the pom poms as " they're like the white ones on Tinkerbell's shoes".  : )


So you get an idea of how big it is- not very practical to yarn wrap!

Monday, 19 November 2012

a slingshot

Inspired by finding a cool sling shot shaped stick on our back lawn after a storm and this fab blog post by made by joel:

http://madebyjoel.com/2012/09/diy-wooden-paper-slingshot


Like on the link, we're going to shoot pieces of card instead of small hard objects!


He's in his pjs. I made it for him on a day he was recovering from a nasty bug. I filled his pj shirt pocket with 'arrows' and off he went. I'll find them all over the house the next few days- but he's happy.


Friday, 16 November 2012

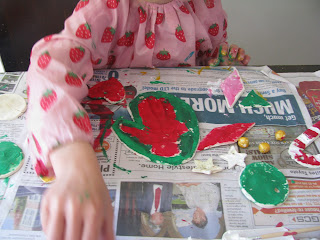
our decos painted

They loved doing this ( so did I). I made a heart for M and a star for T. It's a tradition that I make or buy them hearts and stars every year. For the dough recipe- see my last post.

I experimented with pressing doily patterns in the dough and want to make up another batch just for me and make some little jewellery plates as gifts ( like the picture below). We will make up a batch of this every year. I've had my years of a beautifully colour co- ordinated and themed Christmas tree, from now on it will be decorated with things made by, or for, the kids.


Joining in with the golden adventures of a very dark horse's Christmas tradition linky


better than salt dough Christmas decos

I came across this recipe here : http://woodsidekitchen.blogspot.co.nz/2010/11/clay-christmas-decorations.html

We've just made them, it's so much nice to work with than salt dough, stays white when hardening in the oven ands only takes an hour. We're going to keep ours simple with some gold and red paint ( I was feeling very christmasy I bought some gold nail polish we might use too). I'll add another post when we paint ours up.

NOTE- We doubled the recipe and used every piece of it. Cornstarch is the same thing as cornflour. The recipe says 175 degrees but that's F, put them in an 80 C oven.

Use a REALLY clean pot, some tiny bits of black stuff came off our pot - from all the stirring. The husband assures me that you can hardly see them- but I can and it bothers me a bit. I'll be covering those bits with paint ; )

Dust your work surface and rolling pin with cornflour.

I got the cornflour and baking soda from New World, both were in big packets- for less than $3.

Woodside kitchen's photo:


Clay Christmas Decorations

1/2 cup cornstarch
1 cup baking soda
3/4 cup water

Making Clay

In a medium sized pot combine the cornstarch, baking soda, and water. With an adults help the kids can stir this mixture over medium-low heat. After a couple of minutes, the mixture will begin to thicken. When it looks like smooth, mashed potatoes, remove the pot from the heat. Spoon the ball of dough into a bowl and cover it with a damp cloth until it's cool. When it's cool, knead it on a smooth surface, adding a little more cornstarch if it feels sticky.

Rolling, cutting, and baking

Preheat oven to 175 degrees ( 80 C) . Line baking sheet with parchment paper. Roll out clay to 1/4 inch thick on a surface lightly dusted with cornstarch. Use cookie cutters to cut out shapes. Transfer shapes to the prepared baking sheet. Use a straw to poke a hole in the center top of each decoration, then get the kids to blow out the small piece of clay. They love this task! Place them in the oven at 175 degrees for about an hour, turning them over halfway through cooking.


Paint or decorate them and thread a piece of ribbon, twine or yarn through the holes.


M loving using the rolling pin
Joining in with http://www.verydarkhorse.blogspot.co.nz/ Christmas tradition linky : )